The fall season is one of the most vibrant and wonderful seasons that we have in Canada. With nature coming alive with technicolor, we have the wonderful opportunity to celebrate thanksgiving, see the biggest pumpkins ever and drinking pumpkin spice lattes, pick apples and drink awesome hot cider. It is a chance for us to do fall gardening to prepare for next spring.
Here is a list of 23 things that we’ve compiled that you can quickly (and probably should) do that will help your garden look its best ever next year. We’ve broken down the list of things into five areas: lawn, trees, plants, tools, vegetables, and home.
Read on…
Lawn
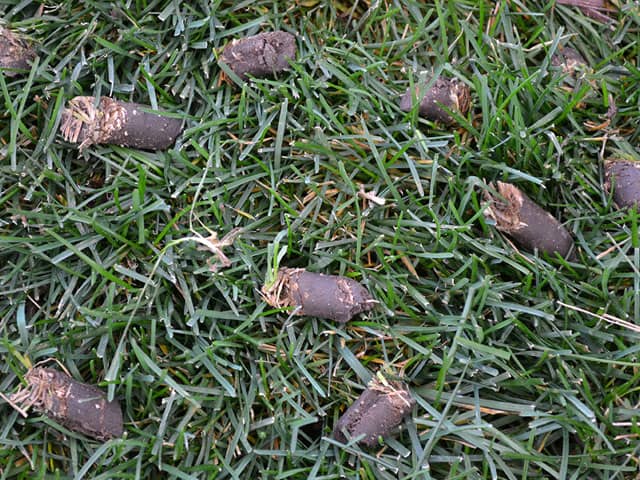 1. Fertilizer – Hunkering Down for the Winter
With the cold Canadian Winters, applying fertilizer in the late fall is probably the most important application you’ll make all year.
Why: A high quality autumn fertilizer will help you build up the roots that will make your lawn a bit more hardy over the winter and allow it to bounce back more quickly in the spring. It has a low nitrogen content and high level of potassium. The increased amount of potassium strengthens the grass and increases its resistance to frost. Using traditional lawn fertilizers will make the lawn more susceptible to frost because of its high nitrogen content.
How: Get a fertilizer that is slow release. Any fertilizer with low nitrogen and high potassium will work.
2. Give your grass a RAT Down
Rake and remove fallen leaves
Aerate with an aerator
Top dress the lawn
Why: Give your lawn the most ideal condition to prepare for the coming winter. Removing the leaves on a regular basis and any yard waste (clippings etc.) combined with aerating will improve the flow of moisture and nutrients right where it is needed, the roots. In addition, removing the leaves and yard waste also allows for light and hinders the formation of dry, brown patches and the growth of moss. Adding some high quality topsoil combined with grass seeds gives the best chance for new grass to take hold in the new year, making for a denser and thicker lawn.
How: Instead of using a simple topsoil, try using an overseeding soil. The overseeding soil minimizes the chance of weeds taking so because it is so light but just enough for the grass seeds to germinate and take hold.
3. One last trim
Cut your lawn before the first snow arrives, probably just before November.
Why: By cutting your lawn to approximately 2.5 to 3 inches in height, this allows your grass to stay upright. This is important because grass that is too tall, tends to bend over, mat down and shade itself. In turn, this creates an environment where your grass is more prone to disease, weeds, and moss, especially in a wet season like spring or late-season when there is heavy snow. Like plants, lawns also need good airflow.
How: Lower your lawn mower to the appropriate height starting with the highest setting and move down until you get to close to approximately 3 inches. Make sure that the lawn mower is turned off when you are lowering it.
Trees
4. Protect the Young Fruit Trees
Why: Protect the young bark of fruit trees from rodents. Fruit producing trees and young flowering trees are susceptible to damage from rabbit and mice during the winter. Trees affected by this include crabapples, fruit bearing apples, pears, and plums.
How: You can use spiral protectors on the bottom of the tree trunk to get great results. Place the plastic spiral protector on trees that are less than 10cm in diameter (measured 80cm from the trunk). Another alternative non-toxic method is to use a product called Ropel.
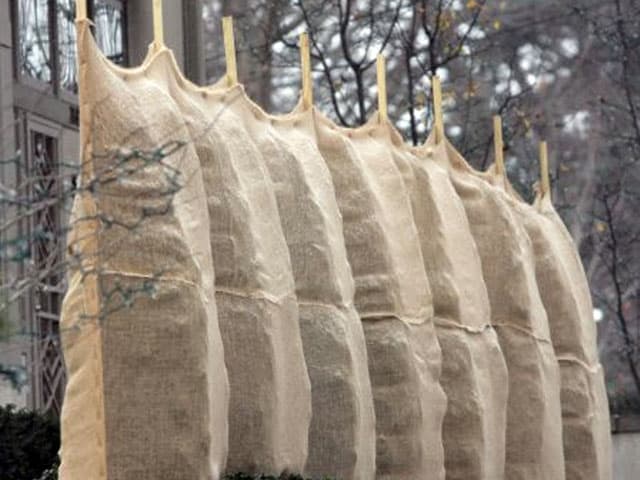
5. Upright Evergreen Trees
Why: Junipers and Cedar trees need to be protected from the drying effects of the wind and the potential burning effects of late winter sun as it reflects off of the snow.
How: You can simply protect these trees using burlap. Preferably two layers of burlap should be used for the best results. Secure the burlap with the use of garden twine.
6. Broad Leafed Evergreen Trees
Why: Dessication is the drying out of the trees tender stems and foilage because of the winter wind. Evergreen trees like rhododendrons, yews, boxwood, holly and other broad-leafed evergreen trees are susceptible.
How: You can use the burlap option (see above) or there is a product called Wilt-Pruf that does the job. You can prevent dessication with a single application.
7. Plant Shrubs and Evergreens
Why: Early fall planting gives new plants enough time to get their roots established before winter. The key is encouraging good root growth. Planting trees and shrubs in fall also enables the root systems to grow before the hot summer returns next season. Consider the following tree species for planting in the fall: maple, buckeye, horse chestnut, alder, catalpa, hackberry, hawthorn, ash, honey locust, crabapple, amur corktree, spruce, pine, sycamore, linden and elm.
How: The perfect time to plan trees is from September to November because it is approximately 6 weeks before the first sign of hard frost and it gives the roots to become more established before the ground freezes and winter sets in. The increase in rainfall and cooler temperatures, you will need to water less.
8. Cutting Hedges
Why: Pruning hedges to prevent decay, especially when there is a moisture accumulating.
How: Cut your deciduous hedges using some sharp shears. Go back as far as you can without creating any openings or holes as these areas will not grow back over the winter and make your hedge look quite bare. Also remove any tree leaves lying on the hedge to encourage fresh air and sun and to prevent rot.
Plants
9. Hardening your Roses
Why: Prepare your roses for the winter so that it can withstand the temperatures and dessication.
How: Hardening off a rose is considered to be complete when the the plant stops growing and becomes fully dormant before the onset of the coldest weather. You want to encourage dormancy by stopping fertilizing and watering 6 weeks before first frost. You can also let the flowers go to seed which also slows down vegetative growth in this state. Lastly, you can insulate from the freeze/thaw cycles by creating a 20-25cm high mound of topsoil around the base of each rosebush.
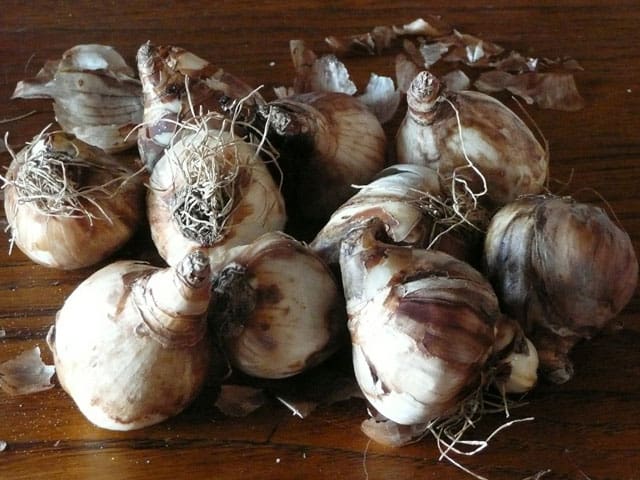
10. Planting Bulbs
Why: Allow your flowers to germinate from the soil at the precise time in spring without you worrying about it.
How: Plant the bulbs in the ground at a depth of 2-3 times their height. It is important that the bulbs have access to moist soil in the spring to start off properly. Make sure that the bulbs in the ground have their tip facing upwards and then cover them with soil from the planter and press down gently.
11. Amend the Soil
Why: Fostering the right growing conditions now will allow the flowers and plants to start off properly in the spring without the need for your intervention.
How: You can amend the soil by tilling it and adding compost or premium black garden soil. If you have your own composter, mix four parts leaves with one part left over annual plants or grass clippings. Throw some compost accelerator into the mix and you’ll be off to a great start.
12. Dividing and Planting Perennials
Why: By dividing and planting spring/summer perennials in the fall, you give the plants a good chance to establish a strong roost system before their bloom the following season.
How: Water the plants a few days before you dig and divide. When you start to dig and divide, do it on a day that is cloudy with a little wind. It will minimize the harsh drying conditions. Dig a hole twice the diameter of the root ball. When you plant, add some low nitrogen fertilizer (0-10-10) to encourage root growth, and prevent excessive top growth. Remember not all perennials like to be divided. Make sure you do your research before starting.
13. Storing Summer Bulbs
Why: Some summer bulbs such as dahlias, cannas, caladiums, callas, and other tender buls are not able to withstand the harsh winters.
How: You can save these tender bulbs and use them next year by storing them in peat moss or sand in a cool (50 degrees F or 10 degrees C), in a frost-free spot or your cold room for the winter. If you have hardy bulbs, just leave them in the ground.
Tools
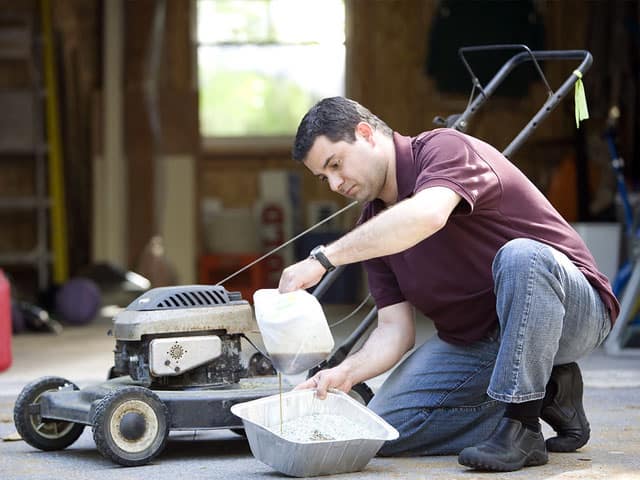
14. Storing your Lawnmower Properly
Why: Minimize the probability of unexpected repairs in the New Year and start lawn cutting right away.
How: Start off by sharpening your lawnmower blade, clean out the cutting deck and then spray it with oil. You should also change the oil, disconnect the spark plug and empty it of gas by run it out of gas. Minimize rust by covering the lawn mower if it is stored outside without a cover (garage or tool shed).
15. Storing your Gas Power Tools Properly
Why: Minimize the probability of having the fuel lines gum up
How: The best thing to do is to run the gas powered tool until it runs out of gas. For the other gas that is stored in a jerry can, make sure you winterize the fuel by adding fuel additive that you can purchase from your local hardware store.
16. Hand Tool Longevity
Why: If you invested in good tools, the last thing you want to see is rust in the new year. Not only is it unsightly, but it weakens the tool.
How: You can scrape the hand tools free of caked on dirt, sharpen them with a bastard file and spray or wipe them down with oil before hanging them up for the winter. Come spring, they are good to go.
Vegetables
17. Clean up the Vegetable Garden
Why: Cleaning up your vegetable garden will ensure that pests won’t make your garden their winter home and minimize the risk of diseased vegetable crops.
How: Simply harvest all root crops and harvest unripened green tomatoes and ripen them indoors. Till in manure or veggie soil to help replenish the nutrients now so that you are ready to go in Spring. You can also use compost as well.
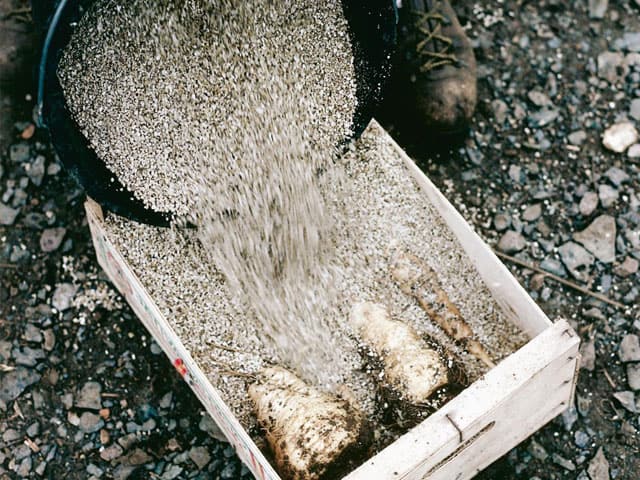
18. Storing Vegetables for the Winter
Why: Save money on your grocery bill and eat your home grown vegetables such as carrots, leeks, and potatoes.
How: Store the vegetables in bushel baskets ½ full of pure dry sand and store them in your basement or fruit cellar or cold storage. For tomatoes, take the remaining tomato plants and hang them in a cellar or garage while the green fruit ripens. No light is required. Make sure the plants are free from bugs before bringing them into the cellar.
Home

19. Interlocking Paver Crack Filling
Why: Fill up the cracks between the interlocking pavers so that the spring thaw will run on the surface as opposed to weakening the base of your interlocking pavers
How: Clean up the interlocking pavers with water and remove any weeds manually (if possible with the roots) or use a weed killer beforehand to make it easier to remove the weeds. Purchase a fine grain paver sand (with an adhesive) and sweep it into the cracks. Lightly remove any excess sand on the surface with a broom. Mist the surface of the pavers thoroughly so that water can activate the glue in the sand and harden.
20. Draining hoses and faucets
Why: Failure to drain hoses or outdoor faucets may cause the trapped water to expand when frozen and damage the hardware.
How: Shut off the water flow to the outside faucet inside the home. Detach the garden hose and roll it up with not attachments. This allows any excess water to flow out and whatever is left will evaporate.
21. Empty out the sprinkler systems
Why: Like garden hoses and outdoor faucets, water that is trapped in the sprinkler system can expand and severely damaging it.
How: Although there are a number of ways remove water from your sprinkler system such as the blow out method, it is recommended to hire a professional to ensure that your sprinkler system is properly winterized.
22. Outdoor Furniture and Equipment
Why: Cleaning the furniture and equipment such as the BBQ can help prolong the life and usage. Food caught or left in the crevices may also invite rodents to nest in the winter.
How: Clean with water and a mild dishwashing liquid to prevent any discoloration or scratching of the surface. The dishwashing liquid is perfect to remove any dust and stuck on food particles. For BBQ, you can take the extra step to heat it up to maximum so that any food particles become charcoal and it will much easier to remove.

Thanks Toemar, Great website with fantastic tips and plans. Very helpful indeed.
Look forward to visiting your Eglington/Terry Fox location shortly for advise on a 14’x14 feet patio I have in mind for this summer as well as landscaping ideas
Hi Joaquim,
I’m glad you like our tips. Definitely drop by anytime and let us know how we can help you transform your backyard patio.
Justin
Hi there, Great tips by the way and thank you. I did have a
question though. I’m hoping you can answer it for me since
you seem to be pretty knowledgeable about gardening.
Is it safe to pour blended food waste (vegetable leftovers,
bones) directly on growing vegetables? If you had some insight I would greatly appreciate it.
It is safe; it will still compost. However, there are negative effects that may include attracting unwanted visitors or pests that may bring diseases. You might also attract insects that will infect your vegetable plants as well as rodents. Organic material needs to break down pretty far before they can become plant food or compost. In addition to pests and disease, you are also introducing a LOT of nitrogen into the soil. Some plants love it, others can get fried by having to much nitro around. You need to pay attention to which plants you are putting the waste onto.
Compost is not just food scraps (green material – nitrogen heavy) but also other natural waste such as leaves and yard waste (brown material – carbon heavy).
The best thing to do with food waste is to get some worms and make a small worm bin; throw your food waste into it and they will help you compost your food waste quickly.