If you missed part 1, of how to install interlocking patio pavers tips, you can click here.
Now that you’ve done your research, visualized your project, received free advice, determined your timeline and budget and possibly hired local help, its time to dig in and watch your dream landscape come to life.
Here are some additional tips that we think will help you to keep your project moving forward:
1. Keep your sketch or drawing close by
You’ve spent all that effort to visualizing your dream landscape, make sure you have it handy so that everything goes to plan. Better yet, make photocopies or scan your plan just in case it gets lost, waterlogged, ripped, eaten by the dog, or even buried (yeah, it has happened before!).
2. Getting the proper tools
You want to keep your significant other happy, get the rights tools so you can get the job done faster and better. Forget the snow shovel and go out and buy the right tool(s) or just rent them.
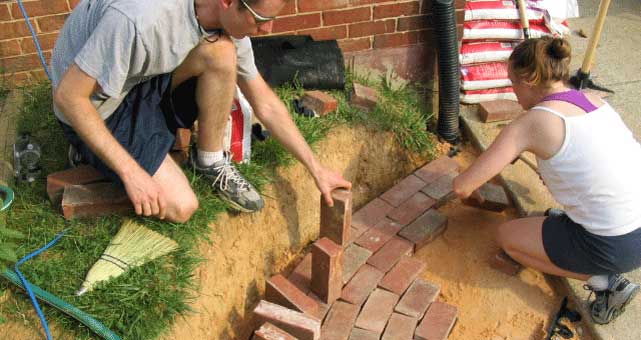
3. Stake it right
Make sure that when you stake out the dimensions of the project, it is important to keep your measurements consistent to your drawings to avoid shortage or overage of materials.
4. Keeping the edge straight
During installation you will need to use string between the stakes as a guide to help keep your interlocking pavers straight. If you want your pavers to stay straight for many years to come, think of installing landscape edging.
5. Tamping the sand
After you have applied the polymeric sand with a broom, use a tamper with a rubber pad to ensure that the sand fills in all the cracks properly. Once the polymeric sand activates, you are going to get a strong cohesive surface that will resist weeds and keep your landscape looking pristine.
6. More free landscaping advice
Just because you’ve started work, it doesn’t mean that you can’t still ask for advice. This is especially true if you encountered something unexpected like a large tree root. It won’t cost you anything and it may save you heartache and frustration down the road.
7. Don’t stop unnecessarily
Place your sand, gravel and stone in piles along the project perimeter so you don’t need to stop when you run out. This will help you keep focus on getting the project done. Don’t forget to cover the piles overnight to protect the sand from the rain.
8. Using a stone cutter
If you want smooth cut curve for your interlocking stone, rent a stone cutter or take it to your local garden centre to get cut it for you.
9. Keeping the help happy
If you’ve decided that you want to hire labour, save time and money by providing food and snacks so your help can stay onsite and help you finish your project faster.

You have provided very useful article.Thank you for sharing about interlocking bricks.
Hi there, Great tips by the way and thank you.
I did have a question though. I’m hoping you can answer it for me since you
seem to be pretty knowledgeable about gardening. Can I use
a plastic liner in a raised bed for vegetables?
If you had some insight I would greatly appreciate it.
You can but the preference is landscape fabric. If you use plastic and it holds/contains moisture, you may end up with root rot and killing the plant. Of course, this depends upon what plant you are installing. Some plants like “wet feet’, others do not. Overall, it is usually best to have good drainage and landscaping fabric does this quite well.